Google Tag Manager is a web application that allows you to easily deploy scripts to a website without having to access the code. If a customer doesn't already have it on their website, it is the first thing we do when we onboard a customer to any of our digital marketing services. It is an easy way to deploy tracking scripts, like Google Analytics, Hotjar or a call tracking script, without having to bug a webmaster or one of our developers every time we want to put code in.
There is one pitfall to Google Tag Manager. If you have never used it before, understanding the concept and using it can be very difficult. I remember when I first found out about tag manager, it took me a few hours to grasp what it actually did, and then took me a further hour or two to understand how to install scripts using it.
I’ve decided to write an article on how to easily install tag manager and then use it to install Google Analytics on a website. I’m a visual learner so have included graphics so other visual learners better understand the concept of Google Tag Manager and the process of installing it, and then using it to install Google Analytics. If you’re not a visual learner and learn from reading – then all you need to do is keep on reading.
Think of Google Tag Manager as a one-way elevator that can only carry JavaScript directly to the source code of a website. Once the Javascript arrives at the website (which is almost instantly because, well it’s 2018 and the internet is fast), it sits there until it is executed by someone visiting the website.
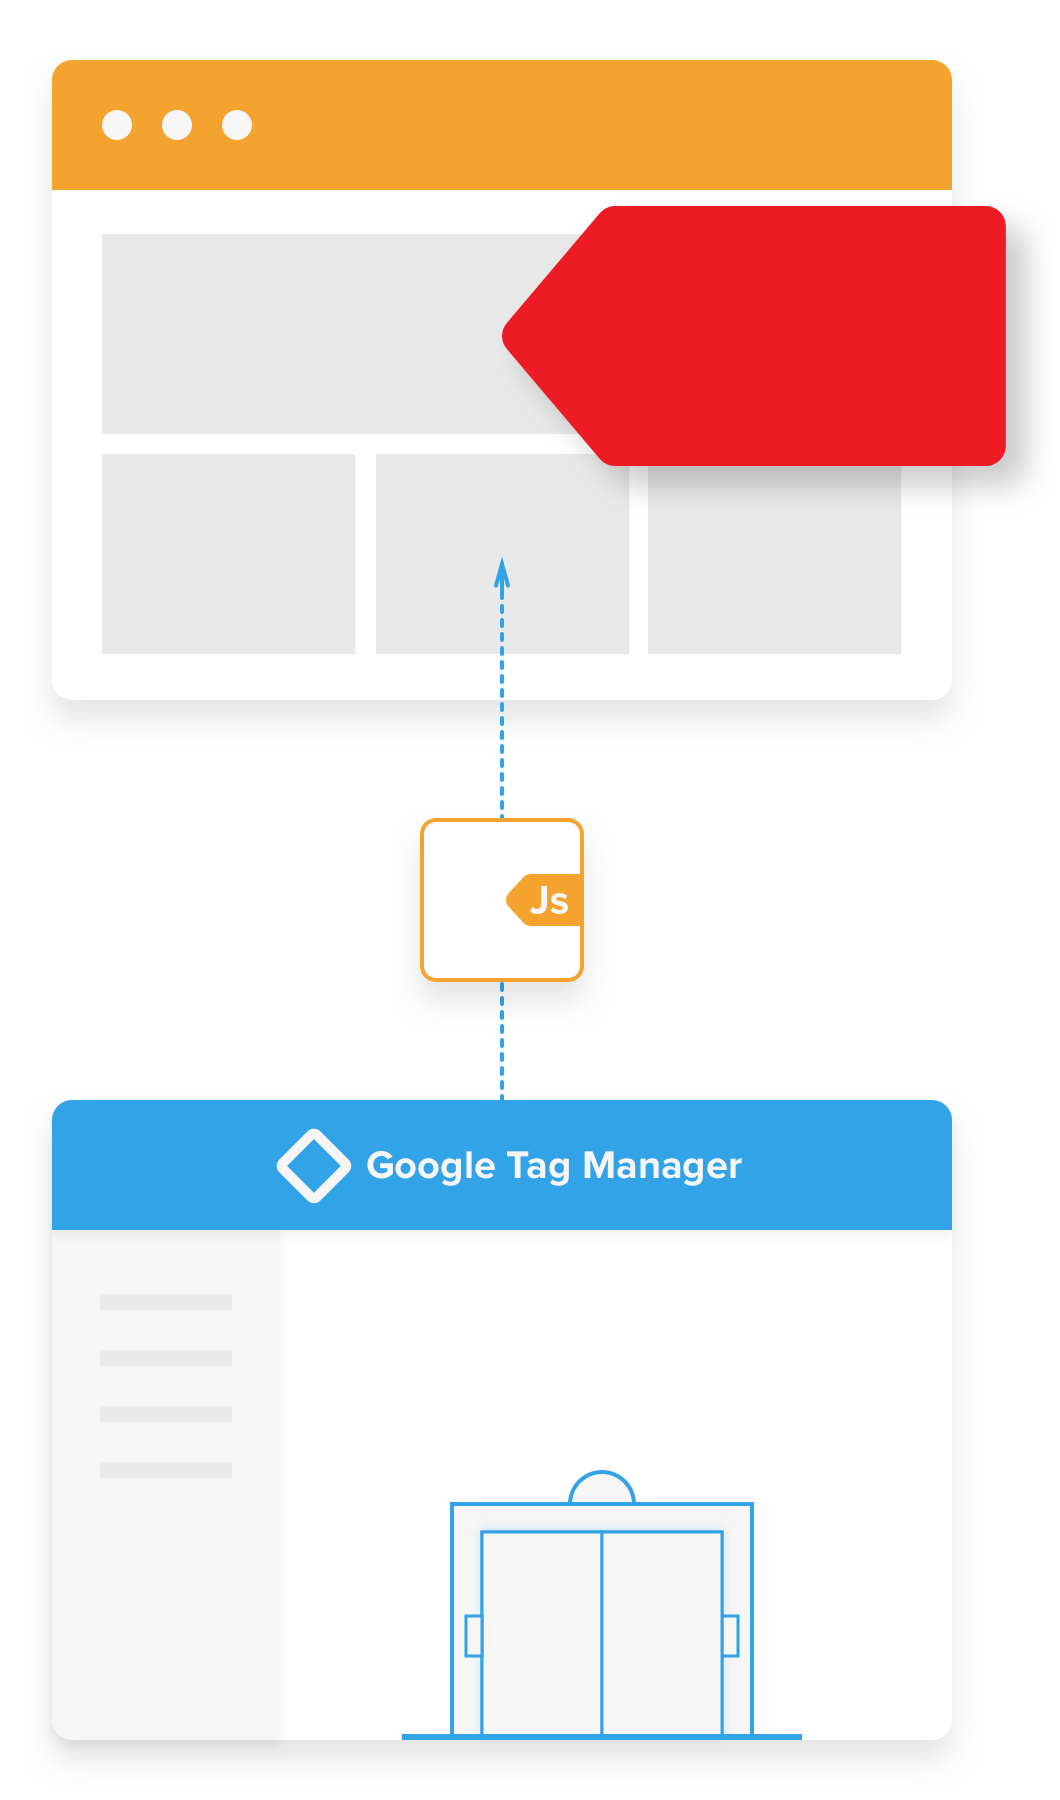
You cannot send JavaScript back through Tag Manager and only those who have access to the Google Tag Manager portal can send JavaScript to the website. Making it an awesome solution for setting up an Google Ads or SEO campaign, it makes things easier.
To install tag manager, you are going to need access to the full source code of the website. Think of it as building the ‘elevator door’ on the website so it can receive our packaged goods (in this instance it is JavaScript).
In order to make the installation as fast as possible, have one tab open with your <header> code displayed and then open another tab to access the GTM console. I also recommend using the Google Tag Manager plugin, so you can test that it is installed properly once you have added it to the code of your website.

Firstly, head over to this link and install the tag assistant. This will help us validate the GTM and Analytics installation.
After you have installed the plugin, head to the Google Tag Manager login and sign in with your Google account (if you don’t have a Google account, you will need to make one.) Once logged in, click 'create account' and fill out the websites details.

Once you have created your container, install the code on your website:
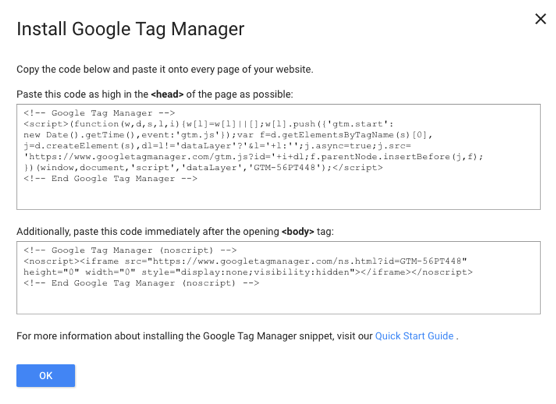
Paste the the first part of the code directly in to the header of your website, as high as possible. The reason why this needs to be as high as possible is because we want the package to be delivered and executed before any other code on the browser runs – this will allow our package to take priority over any other JavaScript on our website.
If you’re thinking “Okaaay Ryan, now you’re just making things up?” TRUST ME, I’m not, in the instance of using tag manager to install Google Analytics, we want Analytics to start capturing information as soon as the person lands on the page, not once the page is loaded and they are already half way down the page.
You also need to paste a short 'no script' code right after the opening <body> tag, this will attempt to make Google Tag Manager run even if the browser has JavaScript turned off.
Alas, that is all the code we need to put directly in to the source code (providing it is working). To ensure we never have to come back to install our tracking scripts we need to test that it is installed correct. For starters, hard refresh your page and then click on the Google Tag Assistant icon in the top right-hand corner of your browser, once you have clicked on it, hard refresh the page again.
Once refreshed, click on the icon, if you see this:
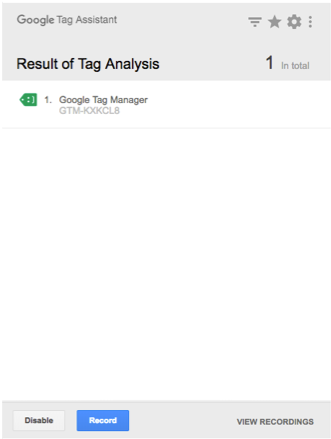
Then you have installed Google Tag Manager correctly. If you don’t see it, go back to the top of this article and read every step again. Chances are you didn’t install the code correctly in the header or body (you can check the codex by inspecting the element and finding it).

Now we have our elevator set up. It’s time to send our first package to the site. In this instance, we will use Google Tag Manager to install Google Analytics. For all of our deployments, especially when we are managing an Google Ads campaign or implementing our on-page SEO service, we follow the same process to ensure we only need to touch the codex of the website we are working on once.
If you already have an Analytics account you can skip this, all you need to do is note down the value that looks like UA-XXXXXXX-XX.
If you don’t, go to Google Analytics and sign in with the same account you used to create your GTM (it doesn’t need to be the same account, but I don’t see why you would create another account just for Analytics).
I recommend you have 4 tabs opeb, 1 x for the Analytics portal, 1 x for the Tag Manger Portal,1 x for this article and 1 where we are going to deliver our package (aka the website).
Click on Admin -> and select the first dropdown under Account -> Create account and follow the steps on the screen.
Find and copy the value that looks like UA-XXXXXXX-XX, this can be found here:
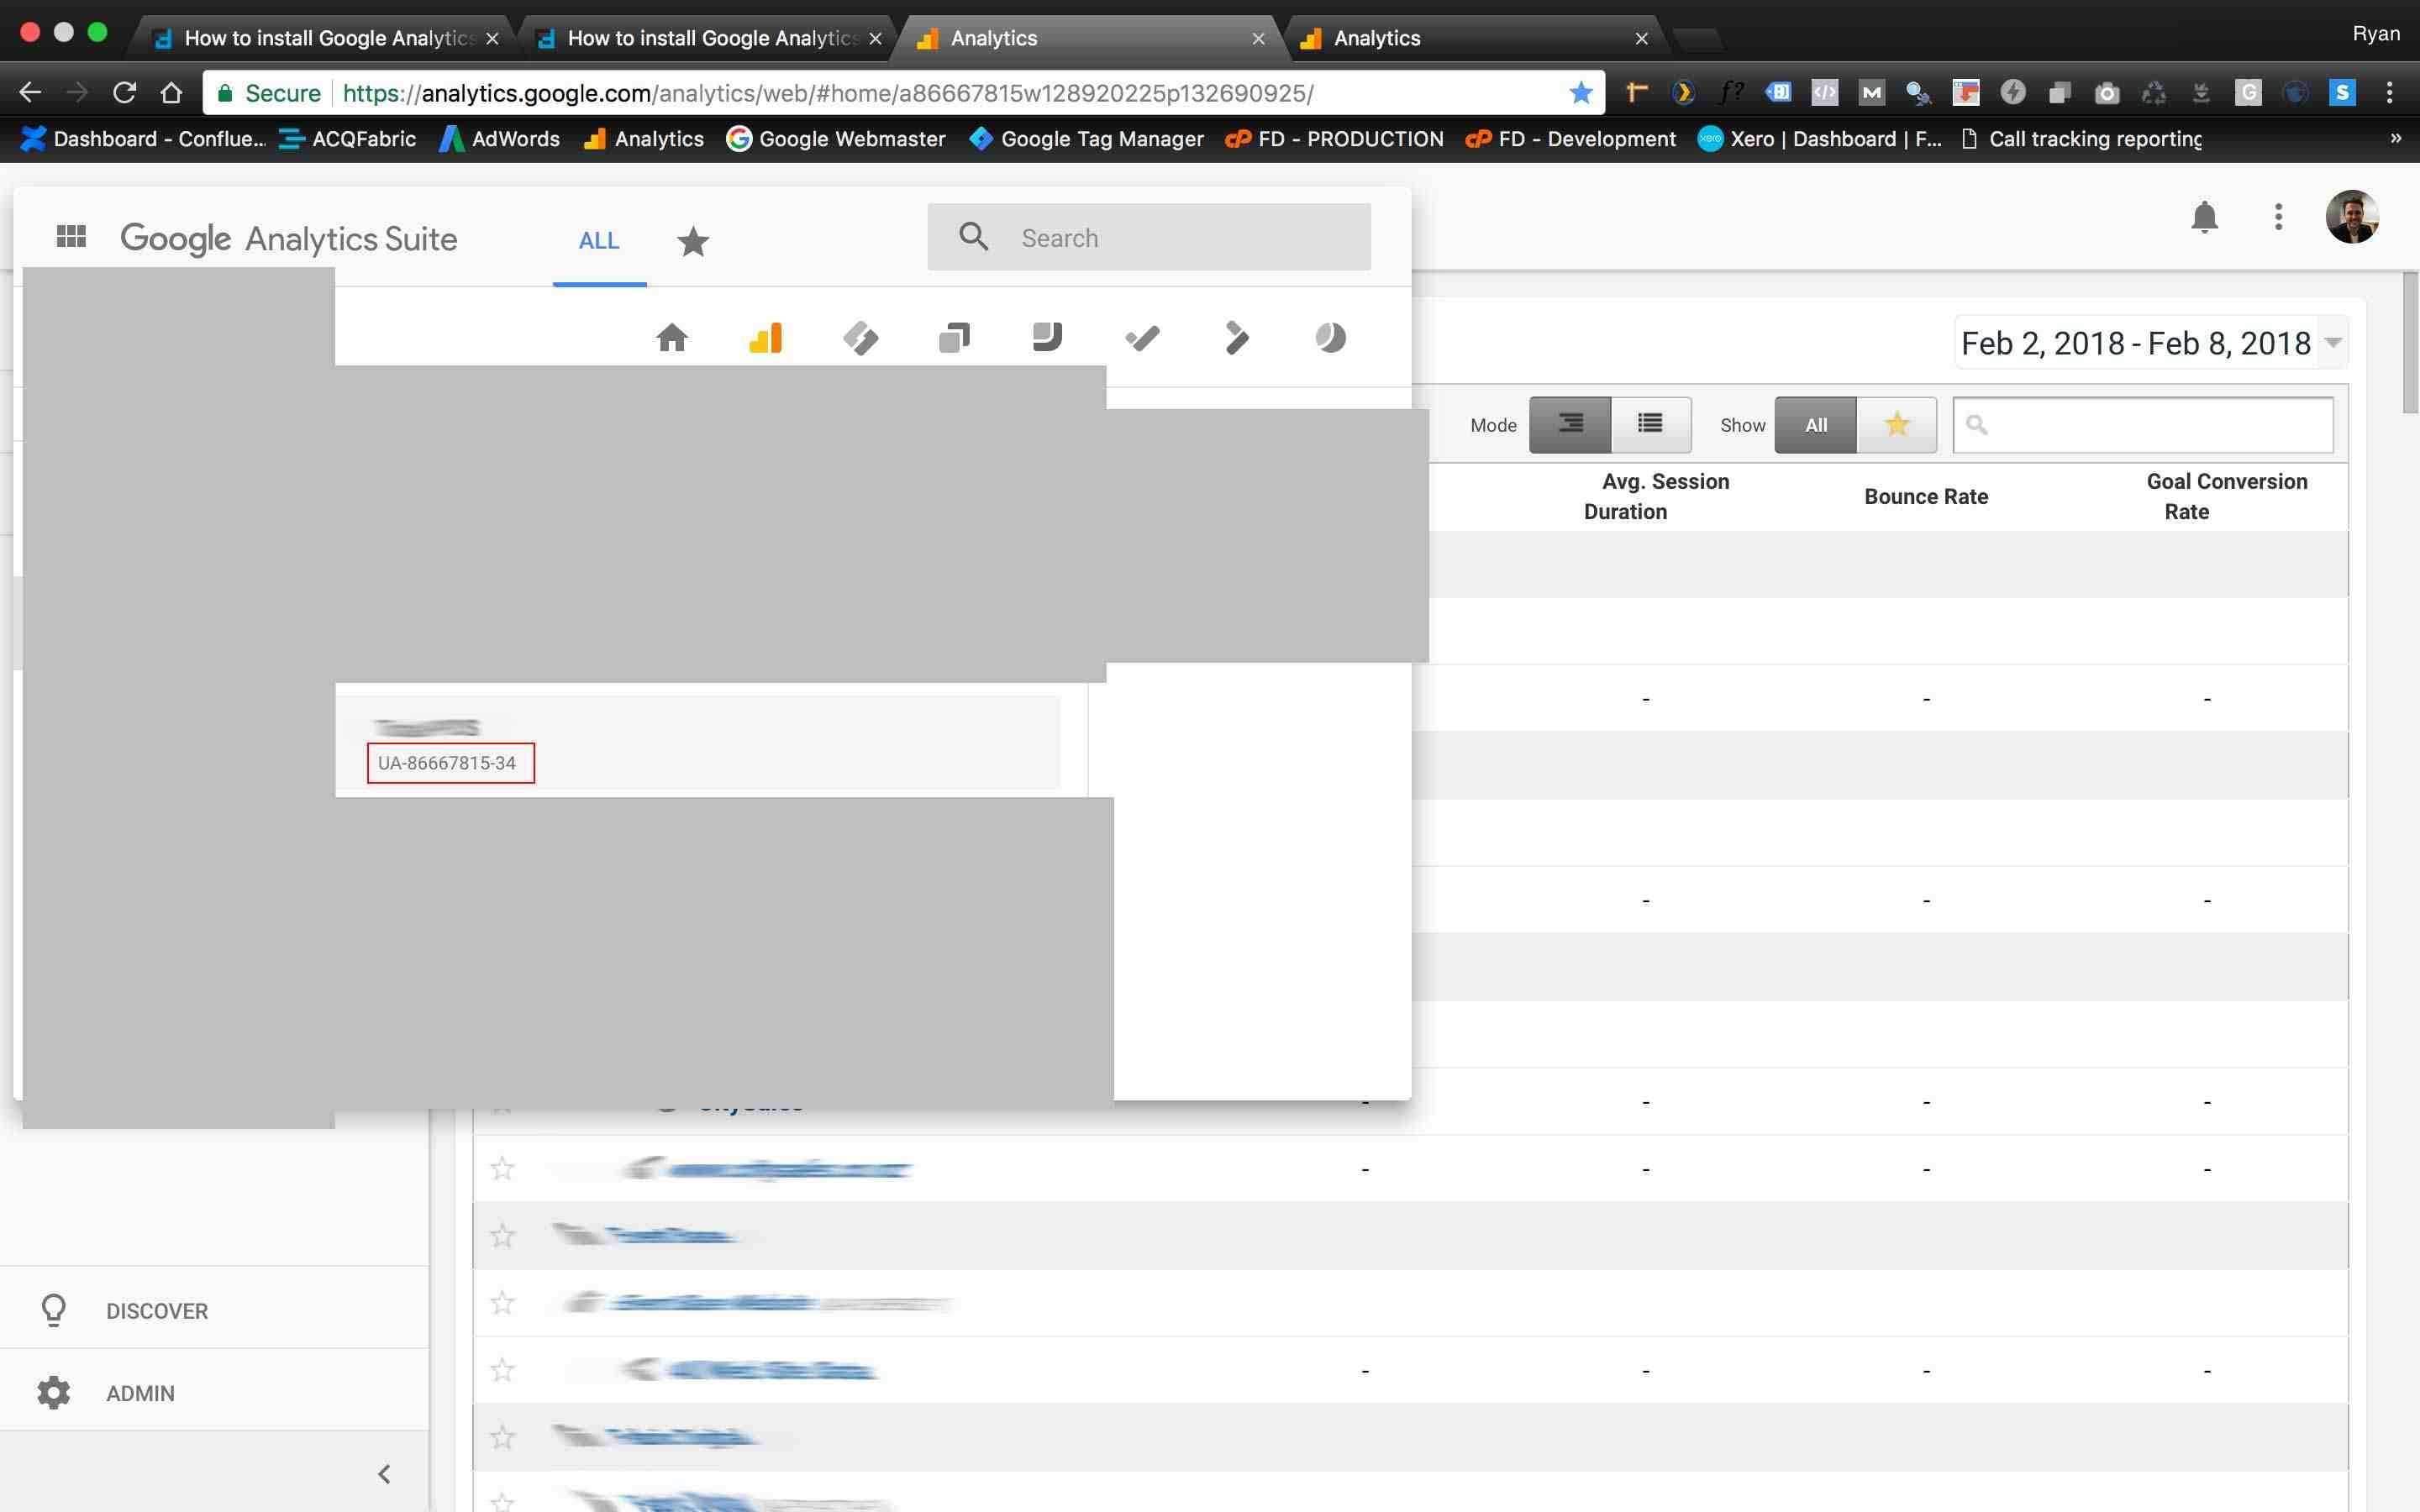
Google Tag Manager will put all of the other code around the value for us (oh the magic of GTM).
Head over to the GTM page and click on ‘Tags’ then click on new and click on Universal GA.
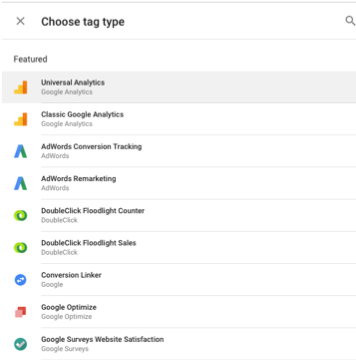
Paste the UA-XXXXXXX-XX code into the box where it says tracking code. You will be asked to add a trigger, click on this and the select all pages as we want the code to fire on every page.
Note – You can imagine that once you become comfortable with GTM you are able to customise when code packages are delivered, where they are delivered to and even why they are delivered, this is a little more advanced, but I will be writing about this in the coming months.

Step 5 – Save and preview
Once you have saved the trigger, you need to click on ‘preview’ in the top right hand corner, this will allow you to see the changes you have made without pushing them to the live site. Once you have clicked this, head over to the your website and hard refresh your browser to clear your cache.
You will be greeted with a GTM window down the bottom of the page, this is an exceptionally useful debugging tool for when GTM isn’t working the way we intend it too. If you have installed it right, you will see a screen that looks like this:

If the debugging console does not look like this, follow our guide step by step again, chances are you have missed something.
Once you have confirmed that the package is being delivered on the debugging console, go back to the GTM tab and click on ‘Publish’. I recommend you add a quick note stating what you have added, and then click submit.
Once you have confirmed everything, head over to the website one last time, hard refresh again, click on the Google Tag Assistant and then hard refresh again, If the drop down looks like this:
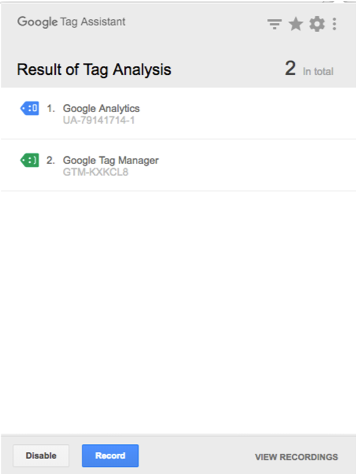
Good work! You have successfully used Google Tag Manager to install Google Analytics, if it doesn’t. Make sure you have installed all tags in the right place and cleared your cache. I find 9/10 of all Tag Manager or Analytics issues can be fixed by a combination of the two.
Using GTM to install Google Analytics is an efficient way to push through the Google Analytics code to a website. It sets up a great foundation to send custom packages further down the track, without having to access the code of the website every time! Fabric use the process outlined above when on boarding any new client that are using their digital marketing services.
It makes things a lot easier when we have intermitted, or no access to the backend of a website and we are trying to deliver our SEO services in Auckland or set up a website so we can manage a customers Google Ads campaign.